
That VoIP phone box has been sitting on your desk for two days now. Maybe you’re stalling because you’ve heard horror stories about tech installations that eat entire afternoons. Or maybe you’re just not sure where to start.
Truth is, I watched my 63-year-old father—who still prints emails to read them—get his VoIP phone running in about 40 minutes. Some cables, a few settings screens, one test call. That was it.
Most people spend more time deciding where to position the phone on their desk than actually getting it working.
What You Need Before Setting Up VoIP
Nothing kills momentum faster than starting the installation only to realize you’re missing a critical piece. Ask me how I know—I once drove to three different stores looking for a Cat6 cable because the one in my junk drawer was actually Cat5.
Internet Connection Requirements
Your internet connection determines everything about call quality. A $400 premium phone on a terrible connection sounds worse than a $50 basic model on solid internet.
Each active call burns through roughly 100 kbps going each direction. So you’ve got three team members talking? That’s 300 kbps total. But wait—those numbers are optimistic. Real-world overhead from packet headers pushes it closer to 400 kbps for those same three calls.
Pull up Speedtest.net right now and run it. Under 5 Mbps upload? You’re probably going to hit problems when Steve in accounting decides to back up his hard drive to the cloud while everyone’s on calls.
Here’s what nobody mentions in those glossy VoIP brochures: latency crushes you faster than slow speeds. Use Pingtest.net to check jitter. Anything over 30 milliseconds and you’ll get those awkward conversations where both people start talking at once because the delay makes it impossible to tell when someone’s finished. Packet loss above 1%? Words vanish mid-sentence.
Cable and fiber beat DSL every time because upload speeds actually exist. DSL providers love advertising “50 Mbps!” but bury the fact that uploads max out at 5 Mbps—exactly what you need for voice packets heading to the other person.
Router and Network Equipment
Dig into your router’s settings and hunt for Quality of Service options. Can’t find it? Your router’s probably too cheap for reliable VoIP. Most routers from 2020 or newer include QoS, but those $35 models from the bargain bin frequently skip it.
Round up this stuff before you tear open that phone box:
- Ethernet cables—Cat5e minimum, Cat6 preferred (that mystery cable from behind your entertainment center probably won’t work)
- Empty network ports on your router or switch (count them now, save yourself the frustration later)
- PoE switch if your phones support Power over Ethernet (fewer cables cluttering your desk)
- Battery backup rated for at least 30 minutes (phones go dead during power outages without one)
VoIP Service Account Details
Your provider sent you an email with credentials after you signed up. Find that email now. Seriously, go search your inbox before continuing. You’ll need:
- SIP server address (something like sip.yourprovider.com or a string of numbers)
- Username or extension (sometimes it’s your email, sometimes just “301” or whatever)
- Authentication password (totally separate from your account login—because apparently one password isn’t enough)
- Proxy server info if your provider routes calls that way
- Outbound proxy settings for systems that handle incoming and outgoing differently
Some providers let phones auto-configure with a single code. Others make you manually enter fifteen different fields. No way to predict which type you’ve got until you read that welcome email.
Hardware Checklist
What you’re setting up changes which equipment you need:
- Dedicated VoIP desk phone gives you the full experience, or
- Analog adapter lets you reuse your existing desk phone, or
- Softphone app turns your computer or smartphone into a phone
Choosing Between VoIP Hardware and Adapters
The hardware you pick shapes everything—your budget, daily workflow, which features you’ll actually have access to.
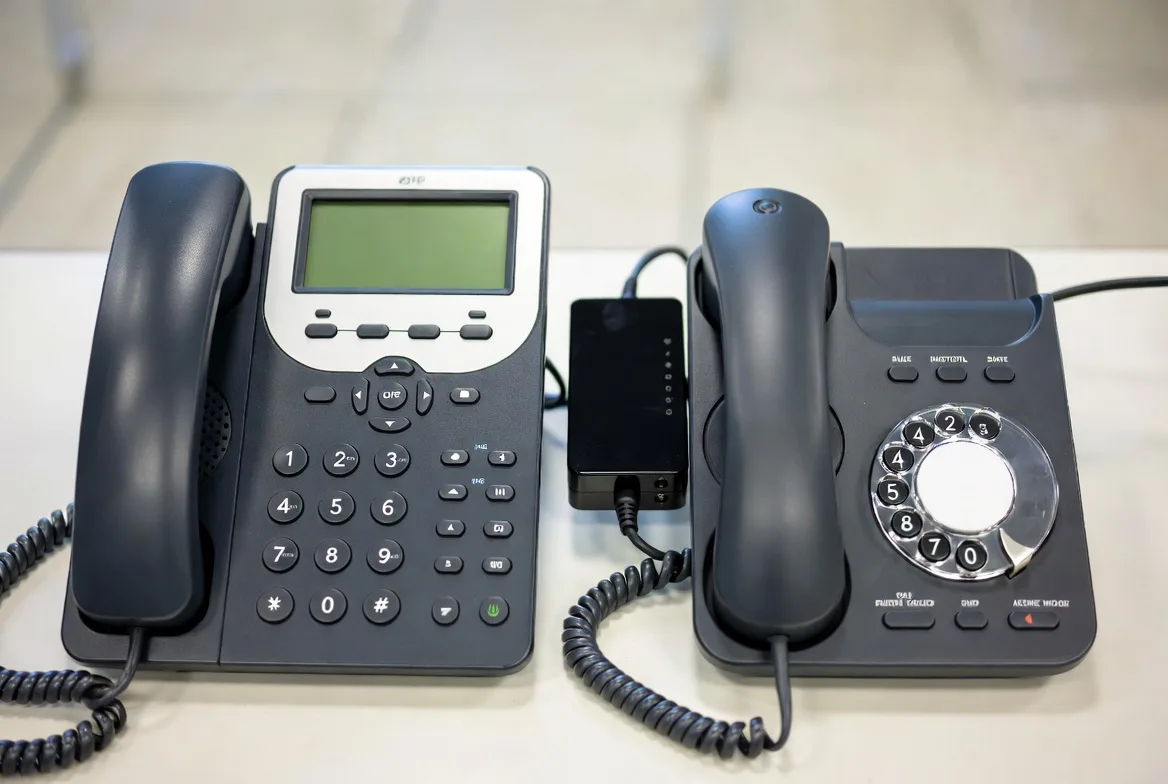
Dedicated VoIP Phones
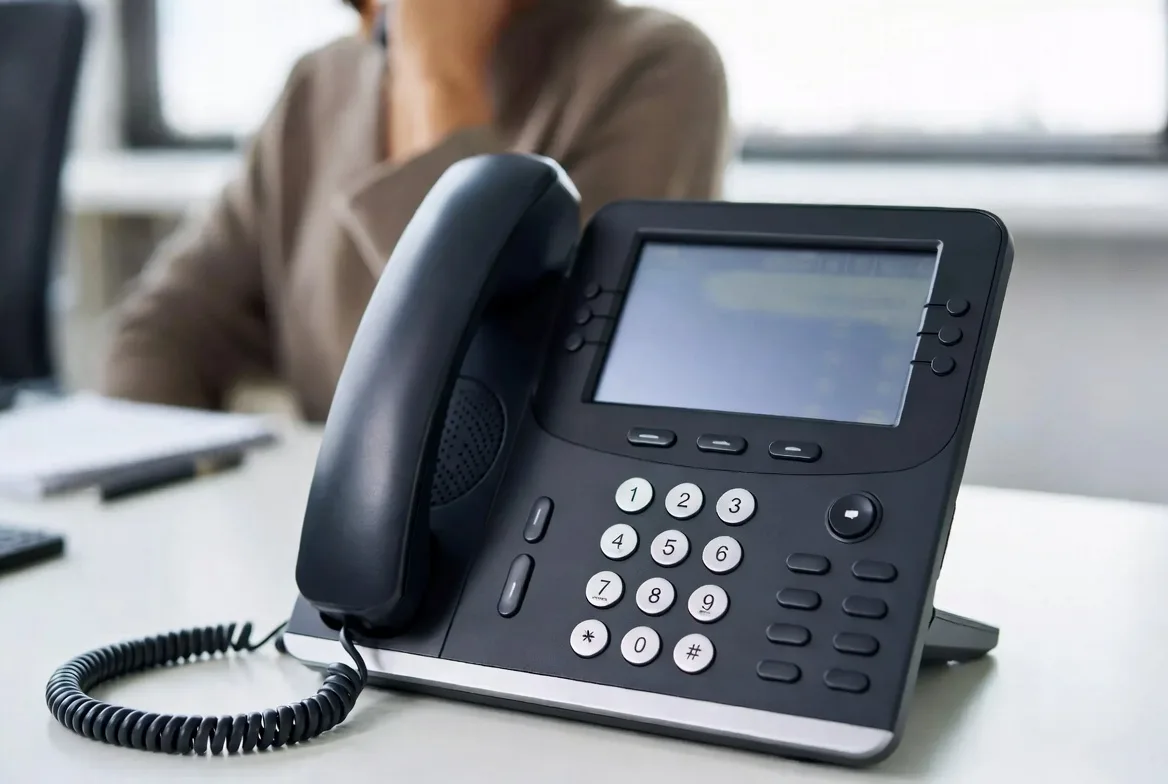
These specialized devices connect straight to your network via Ethernet. They look like regular office phones from across the room—handset, buttons, display—but they’re actually compact computers running SIP software.
Mid-range models ($80-$200) pack in genuinely useful stuff like multiple line appearances, backlit color screens, and programmable buttons you can map to speed-dial your most-called contacts. Entry-level units ($40-$80) handle calls and that’s the full feature list. Premium models ($250+) add video screens, Bluetooth connectivity, Wi-Fi adapters.
Go dedicated when reliability matters more than saving fifty bucks. When you’re spending four hours daily on calls. When you need professional features like busy lamp fields showing whether Sarah from sales is available or stuck on another call. The hardware optimization means better audio processing than generic adapters deliver.
Analog Phones with VoIP Adapters
VoIP adapters—people call them ATAs (Analog Telephone Adapters)—connect your traditional desk phone to modern VoIP networks. Plug your existing phone into the adapter’s phone jack, connect the adapter to your network, and suddenly that 10-year-old desk phone works with VoIP.
Adapters run $30 for basic single-line boxes up to $100 for dual-line units with extra features. You’re saving money by using phones you already own.
Pick this route when cash flow matters more than features. When you’ve got six perfectly functional desk phones and can’t justify replacing them. When you want to test VoIP before committing real money to a full system overhaul. The catch? Adapters add another potential failure point, and you’ll miss features like presence indicators or XML apps that dedicated phones include.
Softphones
Software turns your laptop or smartphone into a VoIP device. Most providers include softphone apps free with your service. Just install and log in.
But reality check—several catches exist. Audio quality depends completely on your device’s microphone and speakers, which were designed for music and Netflix, not business calls. Battery drain on phones can be brutal. And you’re monopolizing your primary work device for calls when you might need it for actual work.
| Phone Type | Cost Range | How Hard to Set Up | Works Best For | The Downside |
|---|---|---|---|---|
| Dedicated VoIP Desk Phone | $40-$300 each | Pretty straightforward | Daily business calling, reception desks, sales teams | Higher upfront investment |
| Analog Phone + ATA | $30-$100 for adapter | Takes a bit more effort | Tight budgets, testing VoIP, using existing equipment | Missing modern features |
| Softphone App | Free usually | Very easy | Remote workers, mobile employees, light phone use | Kills battery; audio quality varies wildly |
Installing Your VoIP Phone Hardware
The physical setup splits into two paths based on whether you grabbed a dedicated phone or an adapter. Neither path takes long once you figure out where cables go.
Setting Up a Dedicated VoIP Desk Phone
Unbox the phone and flip it around. The back panel shows several ports:
- LAN or Network port (your main network connection)
- PC port (optional passthrough for daisy-chaining a computer)
- Power port (unless you’re using PoE)
- Handset port for the curly cord
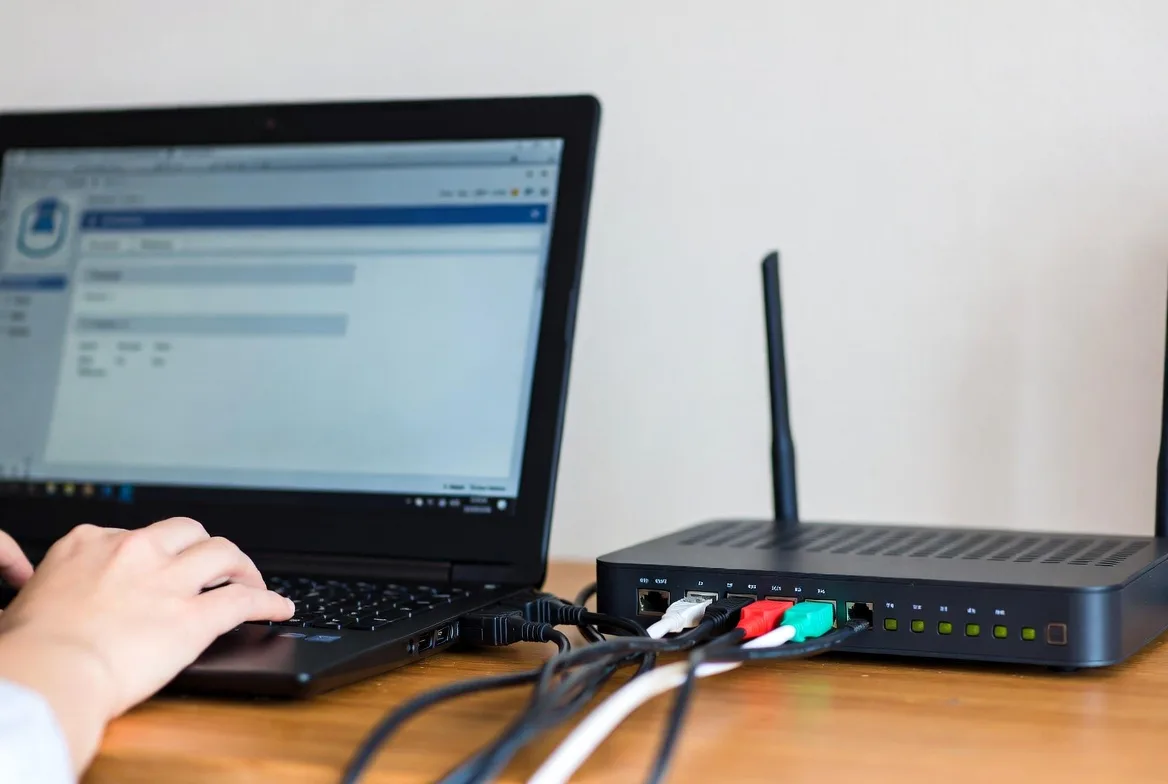
Grab an Ethernet cable. Connect one end to an open port on your router or network switch. Connect the other to the phone’s LAN port. Got a PoE switch that actually delivers power? You’re done with cables—that single line carries both network data and electricity. No PoE? Plug in the AC adapter from the box.
Connect the handset with its coiled cord. Set up the phone stand if one came included. Some models let you adjust viewing angle—do it now before everything powers on.
Hit the power button if there is one. Many models boot automatically when receiving power. The display cycles through startup messages, maybe shows a loading bar, then lands on a home screen displaying time and date. Look for an IP address somewhere on screen—that confirms network connectivity.
VoIP Adapter Setup Process
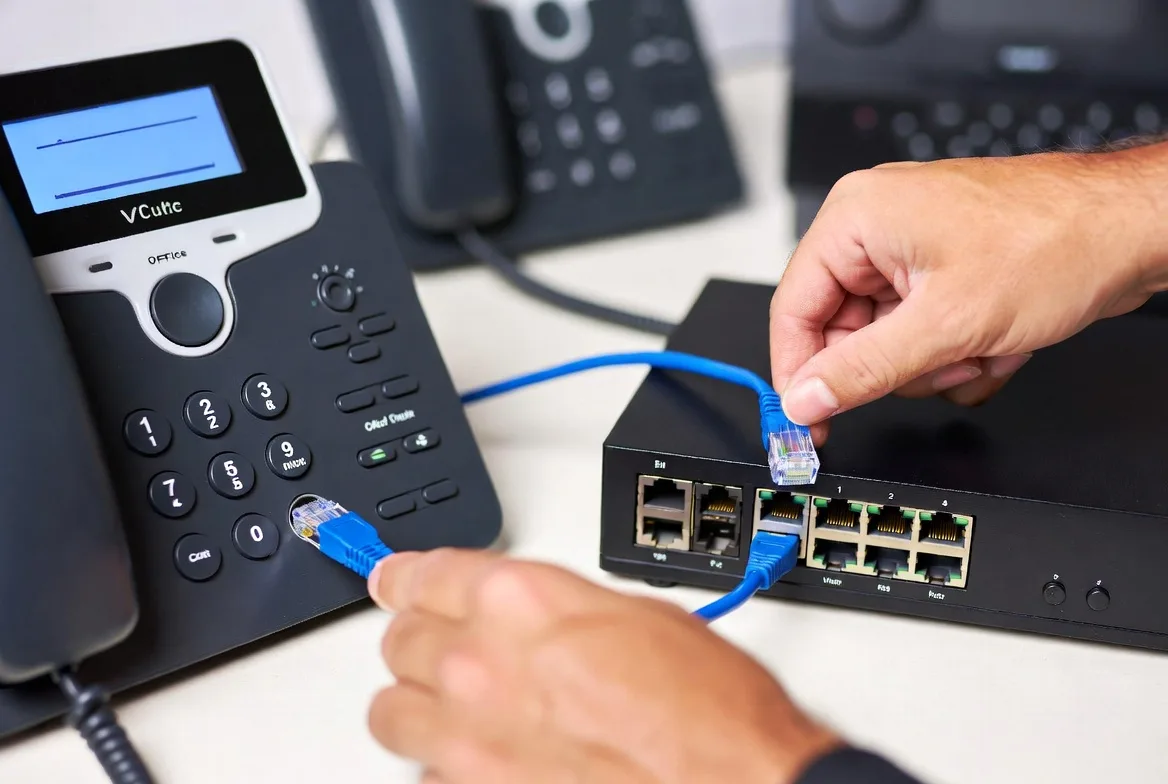
Adapter installation adds one connection to the mix. Grab your analog phone and plug its line cord into the adapter’s phone port (marked “Phone 1” or showing a telephone icon). Run an Ethernet cable from the adapter’s internet or LAN port to your router.
Connect the adapter’s power supply to a wall outlet. Watch the status LEDs on the front. Different manufacturers use different light patterns, but generally you want:
- Solid power light (not blinking)
- Solid internet connection light
- Phone registration light (usually takes 30-60 seconds to go solid)
Check your adapter’s manual for the exact pattern showing “everything’s good.” Usually solid green across all indicators rather than blinking amber or angry red.
Some adapters include a second Ethernet port for connecting a computer—router to adapter to PC. Cuts down on cable clutter but makes troubleshooting harder since you’ve added another network hop.
Network Connection Verification
Once powered up, verify the device grabbed an IP address from your network. On desk phones with screens, navigate to network settings—usually buried under Settings > Status > Network or something similar. You should see an IP address starting with 192.168 or 10.0 (typical home and office ranges).
For adapters without displays, access the web interface. Open a browser, type in the adapter’s IP address. Don’t know what it is? Log into your router’s admin panel and scan the list of connected devices. Your adapter should show up by brand name or MAC address.
Configuring Your VoIP Phone Settings
Hardware setup was the quick part. Configuration—linking your phone to your provider’s network through SIP settings—takes more attention.
Auto-Provisioning vs. Manual Configuration
If your provider supports auto-provisioning, this next section takes about two minutes. Enter a provisioning server URL or short code, the phone reaches out to download its configuration, and you’re done. This approach shines when deploying 10 or 20 phones and refusing to manually configure each one.
Manual configuration hands you granular control over every single setting. Works regardless of whether your provider supports automated methods. You’ll navigate menu systems and type settings one field at a time.
Entering SIP Account Information
Access your phone’s configuration screen. On most desk phones, press Menu, scroll to Settings or Accounts, then pick Line 1 (or whichever line you’re configuring).
Enter these required details:
Display Name: What the recipient sees on caller ID—your name or extension number, whatever makes sense
SIP User ID: From your provider’s credential sheet. Might be an extension number like “301” or email-style address like “john@yourcompany.voip.com”
Authentication ID: Sometimes matches User ID exactly, sometimes completely different. Check your provider’s setup guide if you’re unsure
Password: The SIP account password (not your web portal password—separate for security reasons)
SIP Server: Your provider’s server address. Looks like “sip.ringcentral.com” or numeric IP like “203.0.113.10”
Proxy Server: Often identical to SIP server, but some providers route calls through separate proxy servers
Save everything. The phone attempts registration with the provider’s server. Watch the display for status changes. “Registered” or similar confirmation means success. “Failed” or “Unregistered” means you mistyped something or your network’s blocking the connection.
Adjusting Audio and Network Settings
Registration connects you, but these optimization settings improve call quality and reliability:
Codec Selection: Codecs compress voice for transmission. G.711 delivers pristine audio quality but consumes 87 kbps per call. G.729 compresses aggressively to 32 kbps but sounds noticeably more compressed. Enable G.722 if your provider supports it—that’s HD voice territory, dramatically clearer than standard codecs.
DTMF Method: Set this to RFC2833. Touch-tone signals navigate phone menus and enter PIN codes. The older in-band DTMF method breaks with modern systems. When someone can’t check voicemail or navigate automated menus, this setting’s usually the culprit.
VLAN Settings: If your IT department uses VLANs to segment network traffic, enter the VLAN ID they provide. This isolates voice packets from data traffic, preventing file transfers and web browsing from interfering with calls.
Time Zone: Configure your local time zone so call logs show accurate timestamps. Skip this setting and your 2 PM call appears in the log as 10 PM if the phone defaults to UTC.
Volume Levels: Adjust handset, speaker, and ringer volumes now. Call your voicemail to test audio levels while the settings menu’s still open.
For adapter configurations, open a browser and type the adapter’s IP address in the address bar. You’ll see a web interface mirroring the menu systems on desk phones. Look for tabs labeled SIP, Line 1, or Account Settings. Enter the same credentials you’d type into a desk phone.
I’ve diagnosed hundreds of VoIP problems, and mismatched DTMF settings cause at least a quarter of them. Someone calls in saying they can’t navigate phone trees or access their voicemail box. Nine times out of ten, the phone’s sending in-band DTMF while the system expects RFC2833 signals. Flip that setting and the problem vanishes. Always check DTMF first before you waste an hour troubleshooting.
Marcus Chen
Testing Your VoIP Connection and Troubleshooting
Configuration menus don’t prove anything actually works. You need systematic testing to catch problems before they interrupt important calls.
Initial Registration Check
Look at your phone’s display. See “Registered” or similar positive status? Great. Seeing “Unregistered,” “Failed,” or “Timeout” instead? Time to troubleshoot:
- Triple-check every character in your SIP credentials—passwords are case-sensitive and there’s no “forgot password” button on the phone itself
- Verify server address doesn’t have typos (easy to swap letters in long domain names)
- Confirm your network allows outbound connections on ports 5060 and 5061, which SIP uses for call signaling
- Check whether your firewall blocks VoIP traffic
Test Call Quality
Dial your voicemail system, an echo test number (many providers offer these), or a colleague sitting nearby. Listen carefully for:
- Clarity issues like static, distortion, or robotic voices
- Delay between speaking and the other person hearing you (should feel like normal conversation, not walkie-talkie delays)
- Echo where you hear your own voice bouncing back
- Audio dropouts where syllables or entire words disappear
Quality problems usually trace back to network issues rather than defective phones. Insufficient bandwidth, network congestion from other devices, or misconfigured QoS settings cause most audio problems. Jump into your router’s QoS settings and assign high priority to your VoIP devices’ IP addresses.
Verify Inbound and Outbound Calling
Make an outbound call to your cell phone. Let it ring, answer, confirm audio works both directions. Then call your new VoIP number from your cell. Both directions should connect smoothly.
If outbound calling works but inbound calls fail:
- Check your provider’s portal to verify your phone number routes to the correct device
- Examine NAT settings on your router (some configurations break inbound SIP connections)
- Disable SIP ALG on your router—this “helpful” feature often breaks properly formatted SIP packets
- Review port forwarding rules if your network includes additional firewalls
Check Feature Functionality
Test the features you’ll actually use:
- Transfer calls using both blind transfer (immediate) and attended transfer (announce the caller first)
- Start a conference call with multiple parties
- Access voicemail and check that notifications work
- Verify caller ID displays correctly for incoming calls
- Review call history to ensure the phone logs calls properly
When features don’t work, incomplete configuration’s usually the problem rather than broken hardware. Check your service plan—some budget VoIP plans restrict advanced features like conferencing.
Common VoIP Setup Mistakes to Avoid
These errors range from minor annoyances to complete system failures. Learn from other people’s mistakes instead of repeating them.
Inadequate Bandwidth Planning
Calculating bandwidth sounds simple—100 kbps per call, right? But that’s just the codec’s requirement. Doesn’t include IP packet headers, which add 20-30% overhead. A G.711 call needs 87 kbps for voice data but actually consumes 110 kbps of your connection.
Also consider bandwidth spikes, not averages. Your entire team jumps on calls at 9 AM when the workday starts? You need capacity for that peak moment. Average usage throughout the day means nothing when everyone’s talking simultaneously.
Skipping QoS Configuration
Without Quality of Service enabled, your router treats everything equally. Voice packets wait in line behind file uploads, software updates, YouTube videos. When someone starts uploading photos to cloud storage, call quality tanks.
QoS tags voice packets as high-priority traffic. Your router bumps them to the front of the queue even when other devices hammer the connection. Fifteen minutes configuring QoS prevents countless frustrating calls where people ask “Can you hear me now?” every thirty seconds.
Using SIP ALG
SIP Application Layer Gateway sounds helpful—your router “helping” with SIP traffic by modifying packet headers. Reality? SIP ALG breaks more connections than it fixes. That mysterious one-way audio problem where you hear callers but they hear silence? SIP ALG probably caused it.
Find the setting in your router’s admin panel and turn it off. Location varies wildly by manufacturer—search for “[your router model] disable SIP ALG” if you can’t locate it. Some routers hide it under firewall settings, others under advanced features.
Ignoring Security Settings
Default passwords on phones and adapters are printed in manuals and posted on support forums. Leaving them unchanged is like putting a “please hack me” sign on your network. Change administrative passwords immediately after initial setup.
Enable encryption if your provider supports TLS for signaling and SRTP for media. Yes, encryption adds slight overhead, but it prevents eavesdropping on your calls.
Restrict access to your phone’s web interface to local network addresses only. Zero legitimate reason someone in Romania should access your desk phone’s configuration page.
Overlooking Firmware Updates
Manufacturers release firmware updates quarterly or monthly. These updates patch security vulnerabilities, fix bugs causing random reboots or audio glitches, and sometimes add new features. Running firmware from two years ago leaves security holes wide open and causes compatibility issues with updated VoIP platforms.
Check for updates every quarter. Most phones can auto-update if you configure the firmware server URL. Schedule updates for evenings or weekends when call volume drops.
FAQs
Regular broadband internet handles VoIP without issues. You’re not ordering a special business line or dedicated circuit unless you’re running a 50-seat call center. Focus on connection stability and sufficient upload speed rather than obsessing over whether you need “business class” service. That said, business internet often includes better uptime guarantees and faster technical support when problems occur. Cable and fiber connections outperform DSL for VoIP because upload speeds match the demands of sending voice data, not just downloading cat videos.
Yes, by adding an analog telephone adapter between your phone and network. The ATA converts analog signals from your traditional phone into digital VoIP packets. Works with any standard desk phone—corded, cordless, even that avocado-green rotary phone from the 1970s (though honestly, why would you want to). You’ll sacrifice modern features like XML applications, presence indicators, and programmable buttons. ATAs range from $30 for basic models to $100 for units with multiple ports and advanced features.
Physical installation runs about 5-10 minutes per phone—literally just plugging in cables and powering up. Configuration adds another 10-20 minutes for manual setup where you type in credentials. Auto-provisioning cuts configuration down to 2-5 minutes since the phone downloads settings automatically. Your first phone takes longer because you’re learning where menus hide and figuring out which credentials go in which fields. Budget 30-45 minutes for your first installation, then 15-20 minutes for additional phones once you’ve got the process down.
Figure on 100 kbps in both upload and download directions for each simultaneous call. An office with five people making concurrent calls requires at least 500 kbps dedicated to voice traffic. Most modern broadband connections exceed this requirement easily—even a basic 25 Mbps connection supports dozens of simultaneous calls. Critical factor isn’t peak speed but consistent speed. Run speed tests at different times throughout the day to identify slowdowns during peak usage hours when everyone’s online.
Not even slightly. Ever connected a wireless printer or configured your smartphone’s email? You can handle VoIP phone setup. The process involves following sequential instructions and copying information from your provider’s credential sheet into the phone’s menu system. Auto-provisioning reduces it to entering one code. Manual configuration requires more steps but uses intuitive menu interfaces similar to any modern device. Keep your phone’s quick start guide handy and have your SIP credentials accessible. That’s it.
Auto-provisioning lets your phone download its entire configuration from your provider’s server automatically. You enter a provisioning server address or short code, the phone reaches out across the internet, pulls down all necessary settings—SIP credentials, feature configurations, custom button layouts—and configures itself. Manual setup means entering each setting individually through menu systems, typing in server addresses, passwords, and preferences one field at a time. Auto-provisioning saves substantial time and eliminates typos, especially when deploying multiple phones. Manual setup works with any provider regardless of whether they support automated provisioning and gives you direct control over every configuration detail.
VoIP phone setup combines straightforward physical connections with careful configuration work. Start by confirming your network meets bandwidth requirements and includes compatible equipment like QoS-capable routers. Pick hardware matching your specific needs—dedicated phones for reliability and professional features, adapters for budget-conscious approaches, softphones for flexibility. Physical installation rarely exceeds ten minutes, but allocate adequate time for configuration and thorough testing.
The difference between smooth VoIP operation and constant frustration comes down to details: enabling QoS to prioritize voice traffic, disabling router features like SIP ALG that interfere with connections, selecting appropriate codecs, and verifying registration status before assuming everything works. Test thoroughly after completing setup, checking both call quality and feature functionality under real-world conditions.
Most setup problems stem from network configuration rather than phone hardware defects. When troubleshooting, examine bandwidth availability, firewall rules, and router settings before suspecting equipment failure. With proper preparation and attention to these fundamental elements, your VoIP phone delivers crystal-clear calls and dependable service for years to come.